Archive for the ‘Outdoor’ Category
 Okay, I’ve been a bad boy. It was more than a year ago I said I would update the post with the instructions. You guys didn’t call me on it, so I forgot. The original post is here along with a pdf of the plans I had printed for myself:
Original Tissue Paper Hot Air Balloon Post
The original plans make a balloon that is 60 inches high. That is perfect for the classroom, it takes three pieces of tissue paper per panel and you need six panels. You will find I went big on this one and made a 90 inch version for myself. It is rather unwieldy and difficult to handle, but bigger balloon means bigger lift. At this point, I can put one of these 60″ balloon together in about an hour, where it takes the kids at least 2 hours.
One of the challenges we ran into was finding the aluminum wire we used to keep the mouth open. You want this for two important reasons; first, to add ballast; but more importantly, without it, the kids can’t catch the balloons on their heads. I found the wire at Dick Blick, an art supply store. They list it under sculpture wire, we use the 14 gauge wire. It costs $16 for a 350 foot spool. Each balloon uses about 3 feet. That’s a lot of hot air balloons.
When it is too windy outside, we tend to launch these in the gym. I have two heat sources. The indoor one is a heat gun I purchased from Harbor Freight on sale for $10. It works great, I make sure I handle it so nobody gets burned. The outside source is a plumbers propane torch. Nobody handles that but me, I don’t need to write up any (more) accident reports. If you are using the torch, make sure the kids keep the balloon opened up, if you aren’t careful you can catch the balloon on fire. Oops, only did that once, very cool though. If you do that, light it from the bottom, it goes up into the air and disintegrates … poof. Bad science teacher.
Some day I may make one of those cool chimney launchers, but then I’ll have to store it in my room. It’s already looking like Sanford and Sons in my classroom, I don’t know how much more junk I can store.
Our Solar System to Scale
Posted on: April 18, 2010
- In: Activities | Astronomy | Outdoor | Physical Science
- 8 Comments
 Tomorrow the students learn just how big our solar system is and just how small we are. We will use the attached worksheet to calculate the percent distance from Pluto for the planets in our solar system and our nearest neighbor, Proxima Centauri.
To make this lesson really stick, we first calculate the percentages, then we lay out a long 100 meter tape outside. Students volunteer to be objects and they get a card with the picture of that object on it. Now we place them on the scale based on their percentage distance. The Sun is at the zero point, Mercury being only 1% of the distance to Pluto is at 1 meter. Earth is at 3 meters, Mars is at 4 meters. Jupiter jumps to 13 meters from the Sun. Pluto is at the 100 meter mark.
In addition to the vast distances, I then discuss how big these objects would be at this scale. The Sun, as huge as it is, is only 2.4 cm or 1 inch in diameter. The Earth would be 0.2 mm, about the size of the period at the end of a sentence.
We discuss how long it takes to get from the Earth to Mars (a 6 month trip by rocket). The people who are Earth and Mars are fighting for space on the tape, it’s crowded near the Sun. After they start to get a sense of scale, I hit them with this. At this scale, the next closes star, Proxima Centauri, is 676 km (420 miles) away, or roughly the distance from Philadelphia to Portland, Maine.
PITSCO Catalog
Posted on: August 23, 2008
A friend of mine who teaches Middle School Technology gave me this catalog a couple of years ago. There is actually a series of catalogs for different areas. Their web site is a bit confusing, it seems they are a series of companies, all with the goal of improving technology and science education.
The “PITSCO Ideas and Solutions” catalog is a perfect fit for this web site. The catalog is organized into activities such as Robotics, Sustainable Energy, Physical Science, etc. Under each subheading is one or more activities. Under Physical Science, they have kits and materials for Mouse Trap Vehicles, Catapults, Trebuchet, and Egg Drop Vehicles.
I really like their ideas, and there are a lot of them, but they seem totally focused on Middle School. The materials are very expensive and can often be easily found for much less money. For instance, you may have read my post about building Hot-Air Balloons. They have a material kit that has enough tissue paper, glue sticks, etc to make 25 balloons for $99. I’m pretty sure you can do that for less than $20 with no difficulty. They have a propane burner launch station designed with safety in mind for $345. Don’t get me wrong, great stuff, just pricey.
You can find them on the web at www.shop-pitsco.com. I suggest you start by ordering a catalog.
Building a Tetrahedral Kite
Posted on: June 25, 2008
- In: Activities | Outdoor | Physical Science | Projects
- 6 Comments
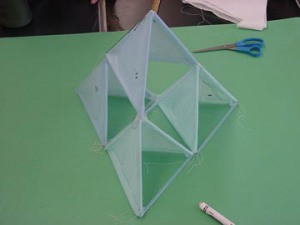 This is a very cool activity. If you look at how this kind of kite is built, you will see it grows like a pyramid. The result is that you have a set number of cells that have to be built to make this work. Here is the link where I got the project in the first place.
http://britton.disted.camosun.bc.ca/tetrakite/tetra.html
Also an NCTM site: http://illuminations.nctm.org/LessonDetail.aspx?ID=L639
Now for some pointers:
- Think light. Apparently there is a kite season. Good luck finding kite string when it isn’t kite season. I use macramé string I get at AC Moore. The macramé string is strong and inexpensive.
- It helps to precut the strings and the tissue paper. Again, I purchase tissue paper at the dollar store. They have 30 very colorful sheets for … yep, a dollar.
- Rather than tying the ends of the strings together as instructed, I’ve found that it’s easier, quicker, and better if I use a separate small left over pieces of string and just tie the corners together. It’s much easier to get a tight joint and tight connections make for a happier kite.
- I’ve made these kites with 4, 10, and 20 cells. With 4 cells it wouldn’t get off the ground. With 20 cells, only the slightest of winds and we couldn’t keep it on the ground. I like to supersize my science whenever possible.
- Pay careful attention to step 19, creating the bridle. You are going to have a hell of a time making it fly if you don’t put it in the right place.
- I had never seen one of these fly, so I was surprised when I realized they fly upside down. In other words, the point of the pyramid points down. To launch, simply place it on the ground, give the string a slight pull to try to lift the kite onto the point. If there is any wind, the kite will take off into the air.
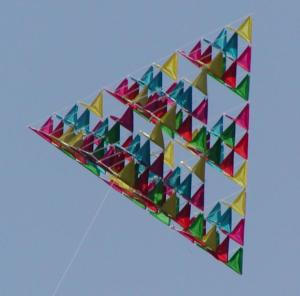 There is a lot more you can do with this design. The picture on the right is a group effort by a 4th grade class. There is a lot of great information and ideas at their site: http://www.cit.gu.edu.au/~anthony/kites/tetra/straw_plan/
One final point. I could barely get the 20 cell kite through the door. If you are planning on going larger than 20 cells, you might want to plan to build modules and connect them on site, or maybe have a set of double doors to get your monster kite out of the building.
Tissue Paper Hot Air Balloon
Posted on: June 15, 2008
- In: Activities | Outdoor | Physical Science
- 22 Comments
This is a really enjoyable projects for the students. I’ve done this with kids from 7th grade to 12th grade and always with positive results. Allow two days for the building of these balloons. Use the template design to make a full size template. Even better, make several templates, it will make the project go much faster and smoother.
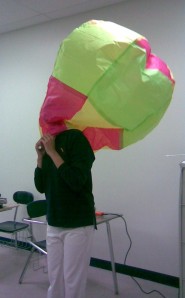 The hot air balloons are almost five feet tall when they are completed. If the students put a little thought into the design, they turn out really colorful. I do this activity when I’m discussing buoyancy. The temperature differential between the air inside the balloon and outside the balloon causes a density difference. The inside air expands due to the heat and becomes less dense. Just like in any liquid, an object less dense than the surrounding medium will float. One of the key points is that air is a medium just like water and that is why the balloon floats. This is not a good activity to do on a hot fall or spring day, a cold, still day is best. If I am in the gym, I use an electric heat gun to generate the hot air. If I go out to the fields (which is way more fun), I take a propane torch and VERY carefully heat the air inside the balloon. Last year I caught one of the balloons on fire. It took off into the sky and burned at the same time. There was nothing left in only a few short seconds.
I used to get the tissue paper on sale after Christmas at craft stores and drug stores. Now I go to the dollar store, they have a pack of about 30 very colorful sheets of wrapping tissue for a dollar (duh). As for the size, you won’t easily find the size sheets called for on the web site. I just have them do their best, but if this concerns you, you can scale the size of the template to match the paper.
You will need: tissue paper, glue sticks, scissors, some string (to close the top), and aluminum wire to keep the mouth open. Try to get aluminum wire, copper is much heavier and will impact their flight.
Some quick tips: They use pins to hold the tissue paper together. I just staple outside the pattern, it’s much quicker and easier. You get about two balloons per glue stick, so have plenty on hand. Good scissors really make a difference with tissue paper. When you go to launch, take a glue stick and some spare tissue paper for patching and field repairs.
(These plans were printed off the original site, the original link is dead.)
On the first page you will see part of the template layout. Do not fret, the last page has both the authors original 60″ template and my super-sized template for a 90″ hot air balloon. Yes, I made one. Yes it was awesome, although a little hard to manage.
For some reason, regardless of the age of the kids, they love to catch them on their heads. There is no harm in doing this as long as you did a good job securing the aluminum wire. Have fun.
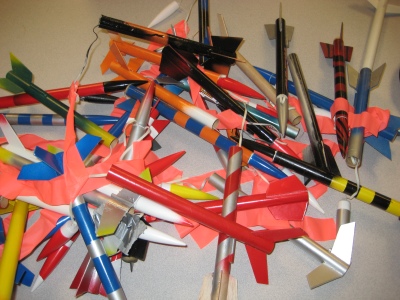
Building Model Rockets
Posted on: June 7, 2008
- In: Activities | Outdoor | Projects
- 8 Comments
I started building model rockets with my students this year and I’m glad I did. Most of my students have never built or launched rockets before. A few did in eighth grade, I think maybe two or three did with their parents, but out of the 100 or so seniors that I teach, that’s was it. About 80% of my students are college bound and only a couple of them are going into science or engineering, so connecting a subject like physics to something hands-on is critical to their understanding of the material. Not that I think most of them understand it, but let me delude myself please.
The school purchased one rocket for every two students. I know in some area schools, the students are required to purchase the materials. I know that most of mine could, but quite a few can’t. So the school paid for them. It took about three days to build and paint the rockets. They build, I paint. I knew I had to when one of my more trusted students came in with a rocket dripping paint. “Several light coats are better than one heavy coat.” Didn’t matter how many times I said that, apparently it didn’t stick.
The next nice day we all trudged out to the field, took lots of pictures posing with our rockets, then we launched them one at a time. I tried to explain how high and how fast they go, but until they saw it they just didn’t get it. A few dramatic failures are good. We had one tail fin fall off because it wasn’t glued on well. The rocket looped just barely over our heads. A few had the nose cone too tight. The ejector charge couldn’t pop off the nose cone, they come down fast and tend to stick in the mud. We even had one actually explode. I’ve never had that happen, I think it was an engine failure and not the work of the student. All these events add to the teachability of the lesson. We learn from our failures.
As a follow up homework assignment, they each had to write an article telling about the project, the launch, and explaining the theory to someone who hasn’t had physics. I chose two of the articles and a couple of photos and submitted it all to the school newspaper for publication.
Some thoughts:
- Each group got a single A engine with the rocket. If they wanted to launch again, they had to purchase an engine for $2. I had some B and C engines, but our field isn’t very big and we lost anything launched with C’s.
- I wanted the kids to purchase the rockets for $2, but only a few did. I would either get them to purchase them up front with their own money or just give it to them. The teams would have to decide ahead of time which of the two gets to keep the rocket.
- I bought a mix of Viking and Wizard rockets. Both are good, they use streamers for recovery rather than parachutes. A parachute in a 10 mph wind will drift twice as far as it is high. So if it goes up 500ft, it will drift 1000ft.
- Walmart is the cheapest place to find engines. A three-pack is under $5.
Stomp Rockets
Posted on: June 5, 2008
- In: Activities | Outdoor
- 2 Comments
When I teach projectile motion, I like to do exercises where the students have to predict the results and then perform the experiment. One of my favorite toys is something called Stomp Rockets. They aren’t as easy to find as they were 10 years ago. They are plastic rockets that are launched from a tube and plastic bladder that you stomp on. If you set the angle to around 45° and jump up and come down hard with your heals, you can launch a rocket the length of a football field. If you launch them straight up, you can use a stopwatch to determine the maximum altitude. This is obviously an outside activity, but there are also foam rockets that we have launched in the gym. Outside is more fun.
I built a supersized cardboard protractor to set the launch angle and I had to rebuild the launch stand because it just wasn’t sturdy enough. The challenge is that you can’t get the same launch pressure twice, so the lesson has to be generic enough to get the point across without getting accurate results. We tend to experiment with the relationship between the launch angle and the distance.
I’ll put some pictures here some day, I haven’t done the activity in quite a while.
Matchstick Rockets
Posted on: May 29, 2008
This is a favorite of the students. After studying Newton’s Laws of motion, we spend a day making rockets from paper match sticks. The process is simple, tear out a paper match, cover the top with a small piece of tightly wrapped aluminum foil, heat the match with a lighter and watch it launch.
Students will typically make at least three of these in a class period. Most go no more than an inch or two, many doing that backwards. Last year one match went 26 feet. This year, I believe the record was 18 feet. Credit goes to Richard White for sending me this last year.
The directions call for making the exhaust tube with a paperclip. That hasn’t worked well for us, the hole is too big. I’ve seen other directions that use a pin. I haven’t tried it with a pin, but I’d like to. In class, we simply wrap the tip tight and count on the gases finding their own exit.
Note: This is an outside activity unless you have a really well ventilated lab, which I don’t. Also, spend $5 on a BernzOmatic lighter. You can get it from Walmart. Aim for a day with very little wind otherwise you will have a hard time keeping the rockets on their launcher and even harder time getting them lit.

Visitor Comments